RCR 72v 45ah Battery Upgrade
This guide walks you through installing the ONYX 72v 45ah battery into your RCR, including connector compatibility and frame-specific fitment steps.
Before You Begin (Important)
- Purchase the RCR 72v 45ah Battery
- If we're out of stock, check out our recommended battery vendor: Amorge Batteries
- If your bike still uses the older red Anderson SB50-style connector, you’ll need to swap out your main battery cable to be QS8-compatible.
- 👉 Buy the ONYX QS8 Main Battery Cable
- ⚠️ Note: Anderson-style battery leads are not compatible with the new 45Ah ONYX batteries.
- If you have already installed the QS8 Main Battery Cable, continue to our Battery Fitment & Installation Guide
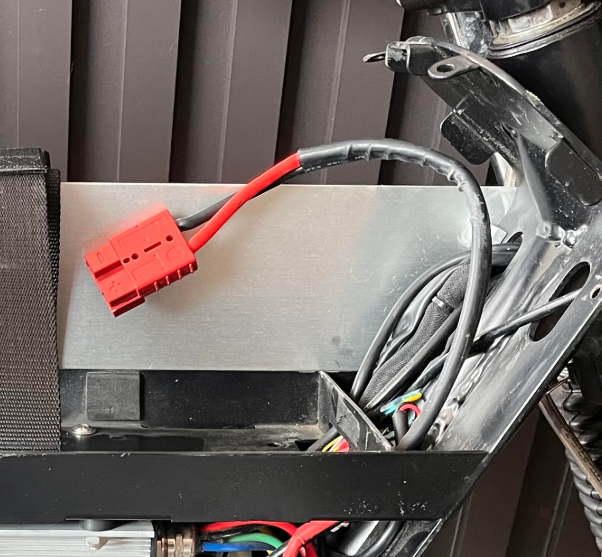
(OLD Red Anderson SB50-style connector pictured)
Step-by-Step Installation
1. Remove the Righthand Side Panel
To access one of the five panel screws, you'll need to remove the seat.
If you do not have a rear rack installed, you can instead loosen the four seat nuts and slide the seat backward and out of the way.
2. Unplug & Remove the Battery
Disconnect your battery and remove it from the tray.
3. Remove the Existing Battery Cable
Use a 14mm wrench to remove the two terminal nuts securing the existing Anderson battery lead.
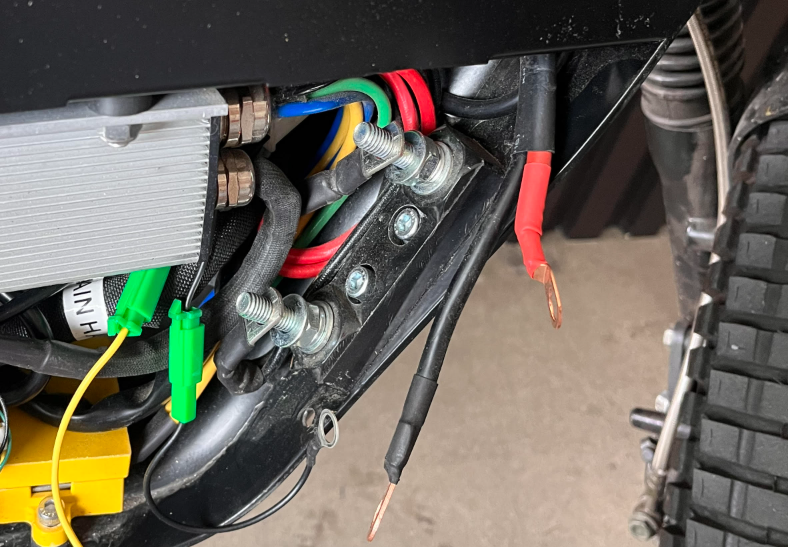
Remove the old Anderson cable completely — it will no longer be used.
4. Install the QS8 Battery Cable
Route the new QS8 connector through the designated hole (see diagram/photo).
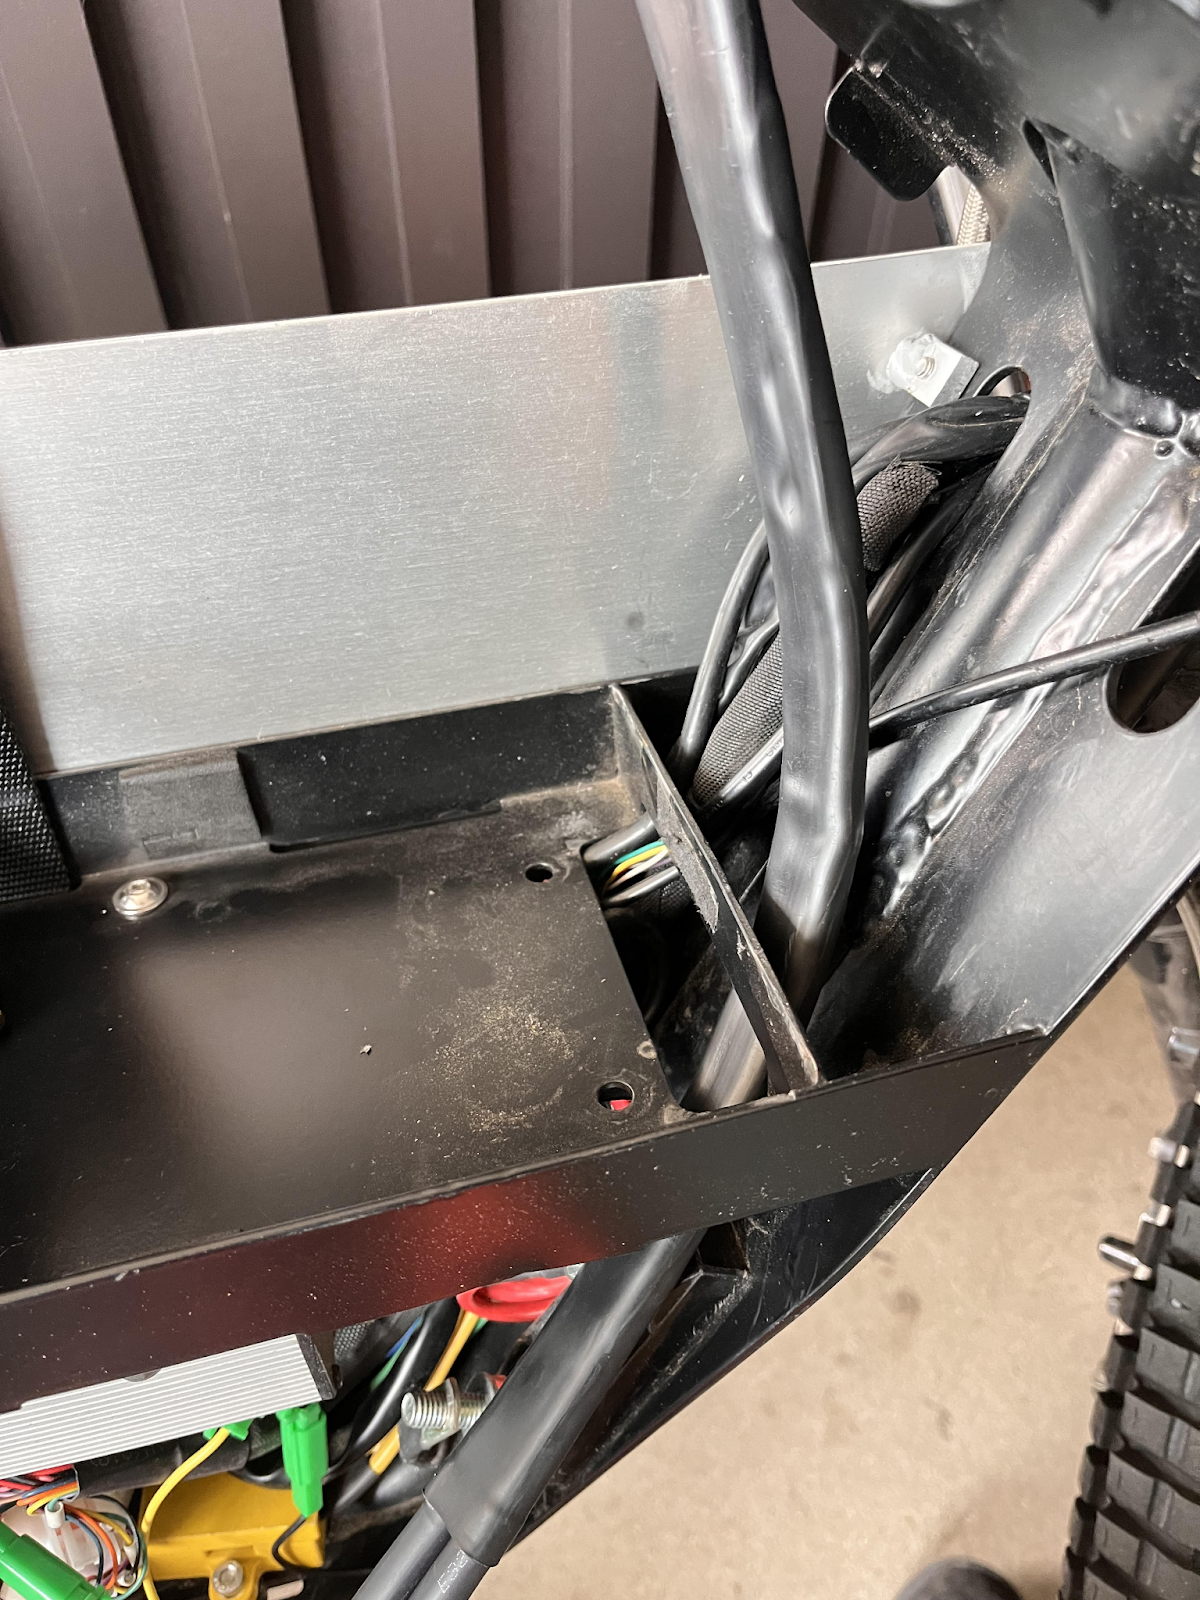
❌ Do not route it through the hole inside the battery tray — this will interfere with battery placement.
5. Connect to Terminal Posts
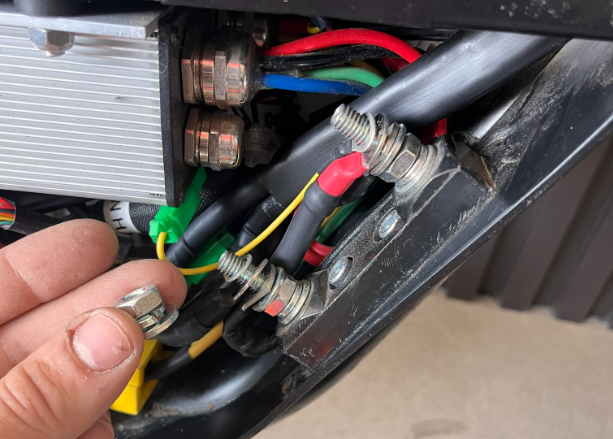
Attach the new positive (red) and negative (black) ring terminals to the matching posts.
These terminals should sit:
On top of the battery/controller lugs
Underneath the terminal post nuts
✅ Color Match Reminder:
Red → Yellow/Positive
Black → Black/Negative
6. Secure the Installation
Tighten the nuts using a 14mm wrench.
Reattach the righthand side panel.
Reinstall or slide the seat back into position and tighten seat nuts if loosened.
7. Install your 45ah!
Continue to our Battery Fitment & Installation Guide
Related Articles
ONYX RCR 45Ah Battery Fitment & Installation Guide
This guide walks you through installing the ONYX 45Ah 72V battery into your RCR, including connector compatibility and frame-specific fitment steps. Before You Begin (Important) This guide applies to riders installing the ONYX 45Ah 72V battery into ...My RCR 72v Battery Won't Charge
This guide explains what it means when your RCR 72v Battery will not accept a charge. Common Symptoms You may notice: Bike powers on only when plugged into the charger Display shows ~83.8V (full charge) After unplugging, the bike stays on for ~15 ...The ONYX 72v RCR Whisperer— John Angel
If you’ve owned, researched, or seriously ridden an ONYX RCR—especially a 72V—there’s a very good chance you’ve come across John Angel. Known throughout the NYC e-bike scene as “the ONYX RCR whisperer” and often referred to as the godfather of NYC ...RCR 72V Controller Guide
Controller Overview The RCR 72V uses a Kelly KLS series controller. All wiring diagrams, configuration parameters, and error code definitions are handled through Kelly’s official documentation and software. This article provides an overview of the ...RCR 72v 41Ah & 45Ah BMS Info / Connection Guide
This guide walks you through identifying your battery, connecting to the correct BMS app, and checking battery health. Step 1: Identify Your Battery Before connecting, confirm which battery you have. 41Ah Battery Requires the Xiaoxiang BMS app ...